Difference between revisions of "Printing"
| Line 4: | Line 4: | ||
[[File: User-Printing-3.jpg|thumb|400px|right|Fig 3.]] | [[File: User-Printing-3.jpg|thumb|400px|right|Fig 3.]] | ||
</div> | </div> | ||
| − | |||
| − | |||
Since Groovix handles printing with an automated administrative queue [[Groovix Print]], printing using Groovix requires the user to confirm print jobs, along with any price associated, before they are released from the queue to be printed. | Since Groovix handles printing with an automated administrative queue [[Groovix Print]], printing using Groovix requires the user to confirm print jobs, along with any price associated, before they are released from the queue to be printed. | ||
Latest revision as of 20:19, 8 April 2012
Since Groovix handles printing with an automated administrative queue Groovix Print, printing using Groovix requires the user to confirm print jobs, along with any price associated, before they are released from the queue to be printed.
To print from your program of choice:
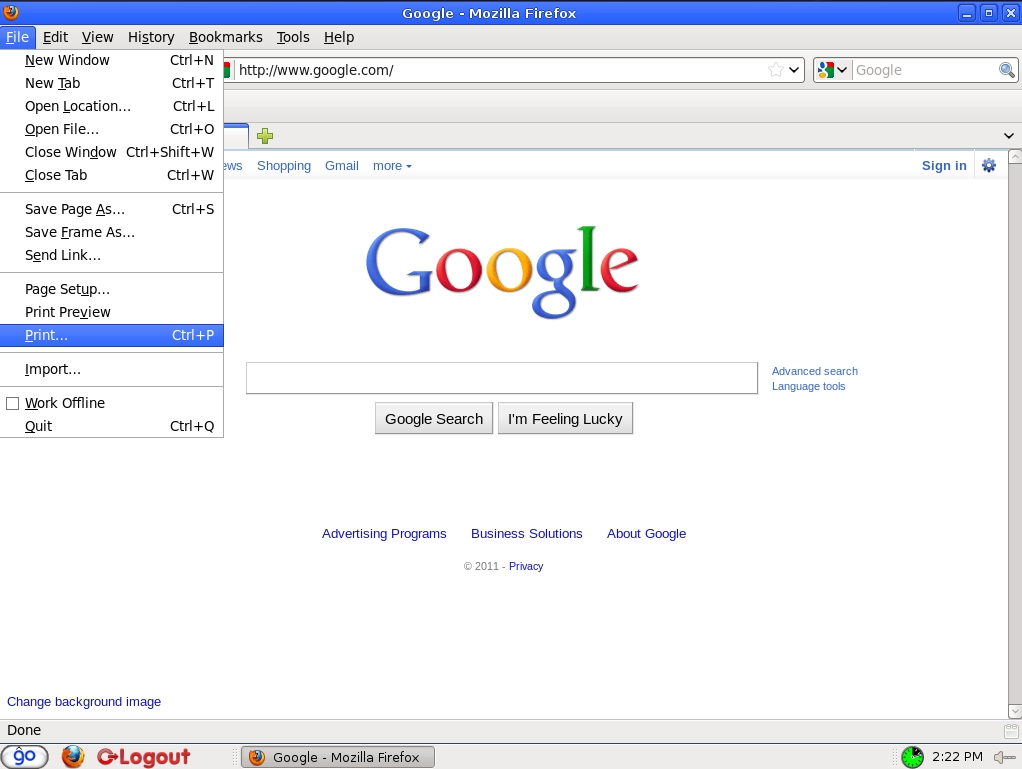
- align the mouse cursor to the "File" option in the menu bar
- left-click the mouse, then, left-click the mouse cursor on the "Print" option (see FIG 1.).
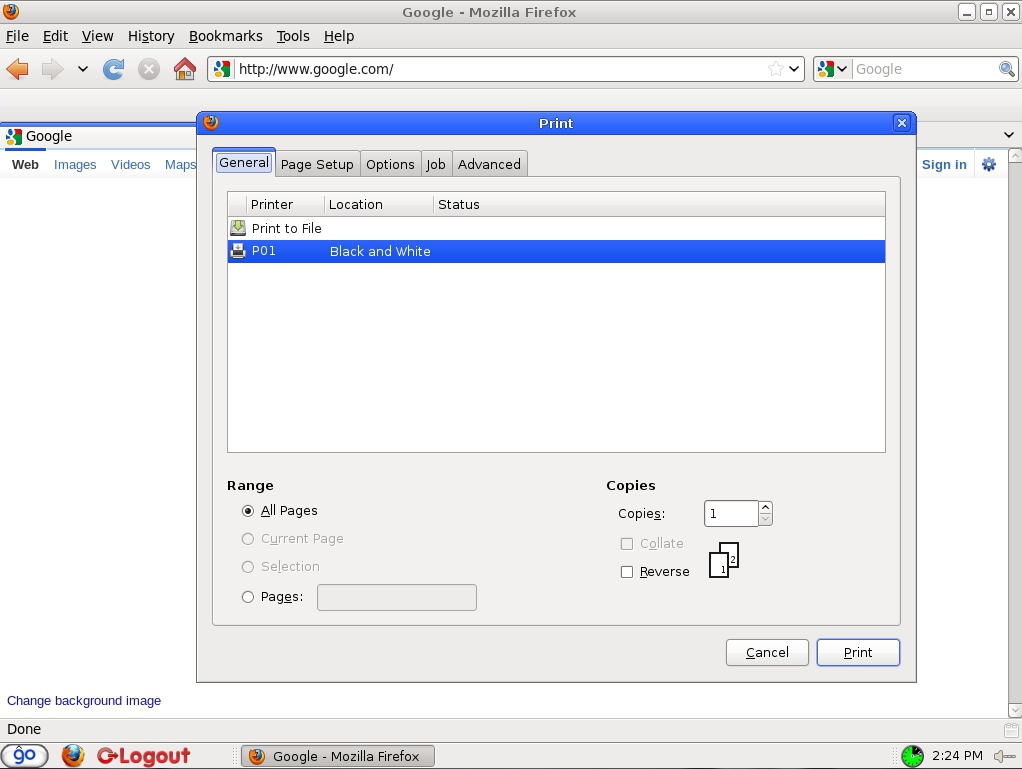
A print dialog box will appear giving the user choices on which printer to print to, page setup, page orientation and number of copies before sending the job to the printer (see FIG 2.). Once the print job is ready to be sent, click the "Print" button with the left mouse button.
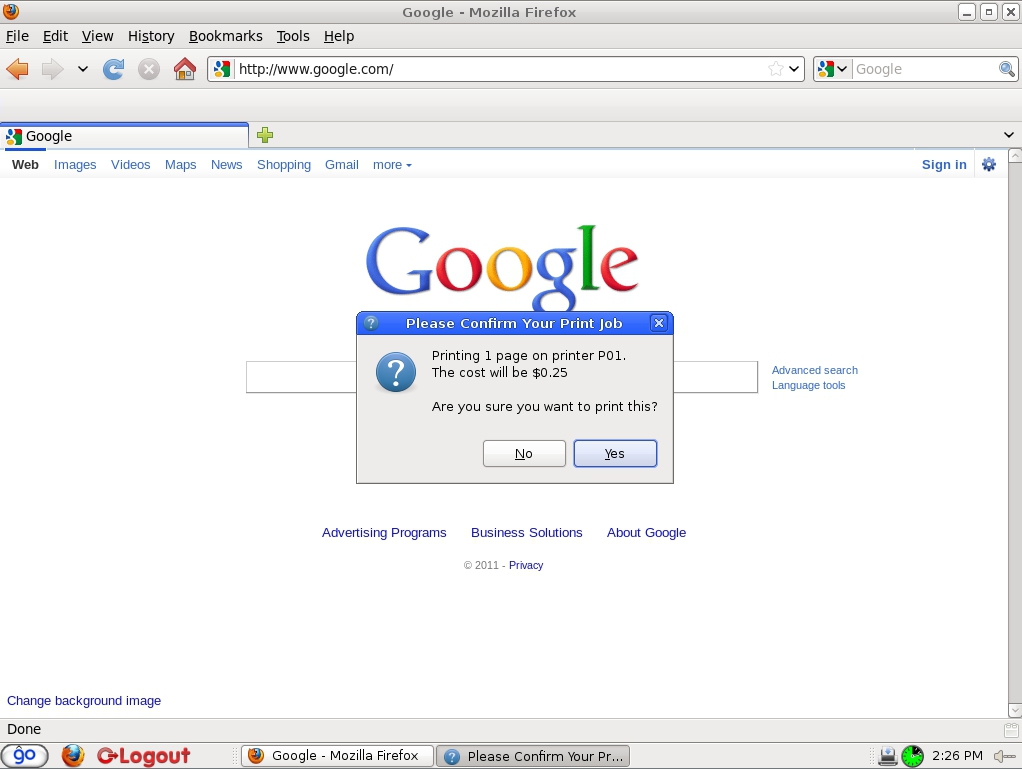
A final dialog box will be shown, confirming the number of pages to be printed and any cost per page being charged (see FIG 3.). Clicking the "OK" button with the left mouse button will send the print job to the print queue where it can be released by a staff member.


